Spider plants are the overachievers of the houseplant world. Not only do they purify the air and brighten up any room, but they also come with a built-in propagation system. That’s right—these green wonders can multiply faster than a rabbit on a carrot farm. If you’ve ever looked at your spider plant and thought, “I could use a few more of you around,” you’re in luck.
Propagating spider plants in water is as easy as pie and nearly as satisfying. With just a few simple steps, anyone can turn a single plant into a mini jungle. So grab your scissors and a glass of water, because it’s time to dive into the delightful world of spider plant propagation. Who knew growing plants could be this fun?
Spider Plant Propagation In Water
Spider plant propagation offers a straightforward way to create new plants while enjoying the process. Growing spider plants from water propagation combines ease with effectiveness.
Importance of Propagation
Propagation plays a crucial role in spider plant care. New plants ensure the longevity of the species, promoting healthier indoor environments. Increased plant numbers enhance air purification and contribute to aesthetic appeal. Those who propagate can share plants with friends, enriching their homes and fostering connections. Nurturing more spider plants supports the overall growth of one’s plant collection, offering endless styling possibilities.
Benefits of Water Propagation
Water propagation offers various advantages for spider plant enthusiasts. This method allows for easy monitoring of root development, making it simple to know when to transplant. Clear containers showcase the growth process, engaging plant lovers visually. Additionally, this technique often results in stronger roots, as plants adjust to their new environment gradually. Reduced risk of soil-borne diseases makes water propagation a safer choice. Lastly, enjoying the simplicity of this method allows anyone to expand their green space effortlessly.
Preparing for Water Propagation
Preparing for water propagation involves selecting the right spider plant and gathering essential tools. With these steps, the process becomes straightforward and enjoyable.
Choosing the Right Spider Plant
Select healthy spider plants with established offsets, often referred to as “pups.” Opt for plants that have vibrant green leaves without any signs of pests or disease. Look for offsets that are at least 3 to 4 inches long and possess a few roots already. These qualities enhance the chances of successful propagation, providing a strong start in water. It’s important to examine the overall structure of the plant to ensure it has adequate energy for growth.
Necessary Tools and Materials
Gather a few essential tools and materials for effective propagation. A clear glass or jar enables visibility of root development. Use clean, sharp scissors or pruning shears to avoid damaging the plants. Fresh, clean water facilitates optimal growth; distilled or filtered options work best. Adding a small dash of liquid fertilizer can support the initial rooting phase. An area with indirect sunlight helps maintain a warm environment for the plant’s growth. These preparations create a solid foundation for successful water propagation.
Steps for Propagating Spider Plants in Water
Propagating spider plants in water involves straightforward steps that can lead to beautiful new plants. Follow these steps to ensure success.
Cutting the Offshoots
Select healthy offshoots, known as pups, that are at least 3 to 4 inches long. Use clean scissors to make a cut just below the root node. Make sure the selected pups have vibrant green leaves to enhance their chances for successful rooting. Avoid any offshoots that show signs of damage or disease. Gathering multiple pups allows for more propagation opportunities.
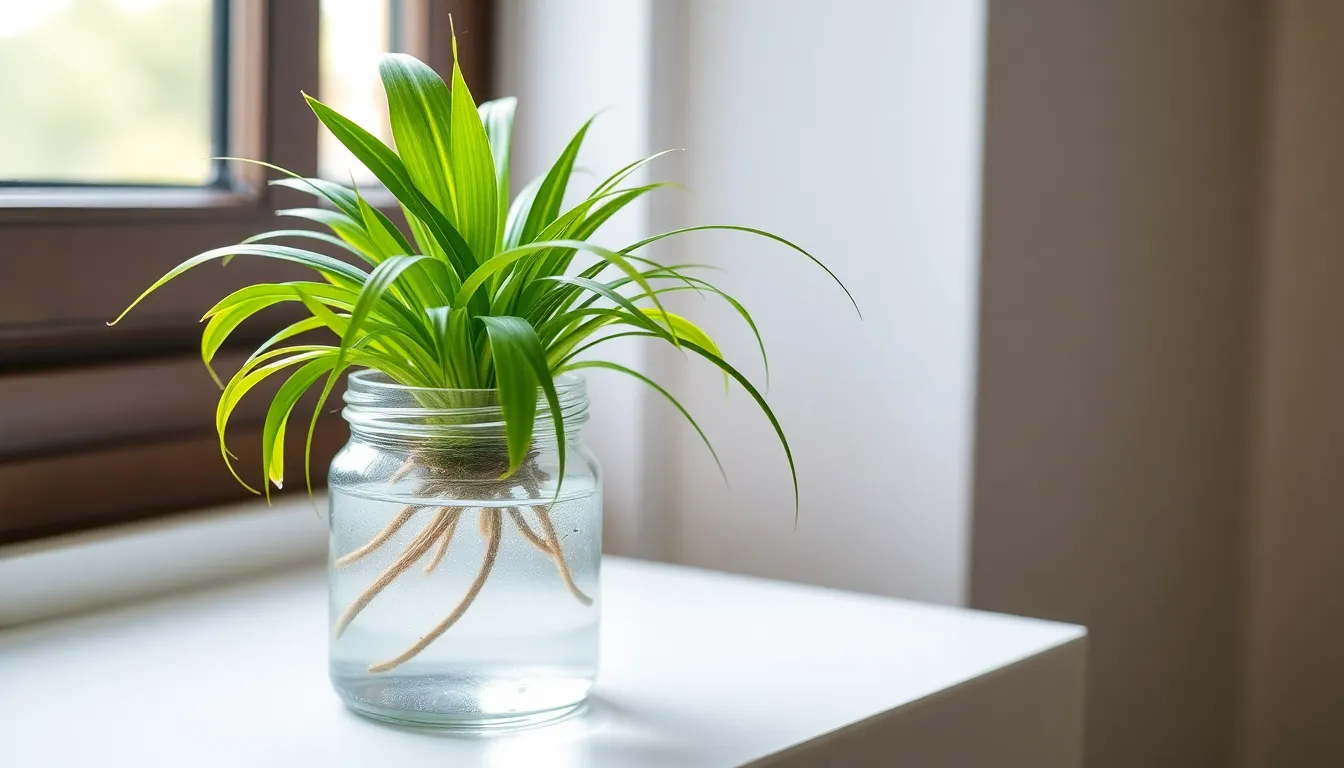
Placing in Water
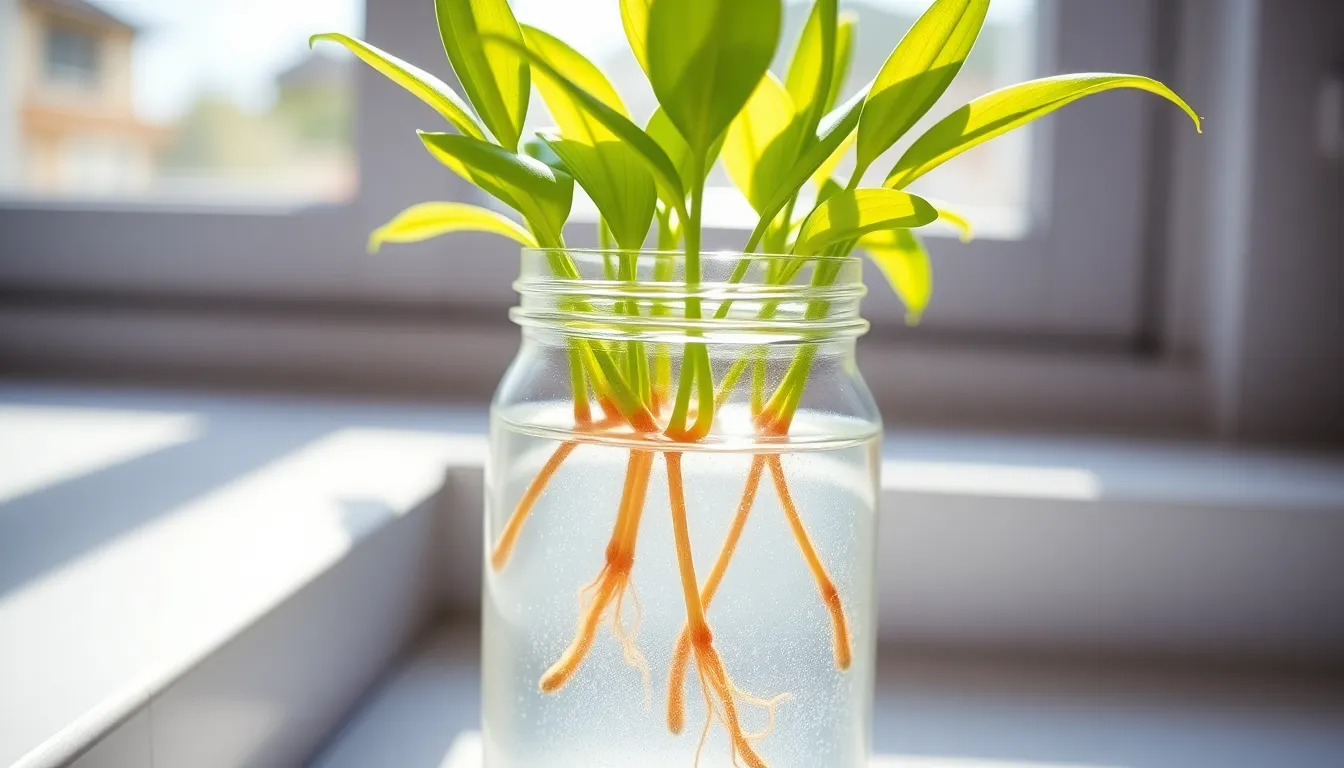
Fill a clear glass or jar with fresh water, choosing distilled or filtered water for optimal results. Position the cuttings in the container, ensuring the root nodes are submerged and the leaves remain dry. Adjust water levels as needed to keep nodes underwater. Place the container in an area with indirect sunlight, promoting warm conditions for root growth. Regularly check the water and replace it every week to maintain freshness.
Caring for the Roots
Monitor the roots as they develop, which typically occurs within 2 to 4 weeks. After roots reach 2 to 3 inches in length, transition the pups to potting soil if desired. Optionally, a diluted liquid fertilizer can support initial growth in water. Maintain plant health by ensuring they receive indirect sunlight throughout the rooting process. Keep an eye on the water levels and adjust as necessary for sustained success.
Tips for Successful Water Propagation
For optimal spider plant propagation in water, specific conditions and careful monitoring play significant roles.
Ideal Water Conditions
Fresh water fosters healthy root development. Use distilled or filtered water to avoid chlorine and other harmful chemicals. Changing water weekly maintains clarity and prevents stagnation. A clear container enhances visibility, allowing close observation of root growth. It’s advisable to keep the cuttings in an area with indirect sunlight to prevent leaf burn and promote gradual growth. Roots thrive in stable temperatures, so an environment between 65°F and 75°F supports successful propagation.
Monitoring Growth Progress
Tracking root development involves checking the cuttings regularly. Roots typically sprout within 2 to 4 weeks under suitable conditions. Observing changes in root size provides assurance that propagation is proceeding well. It’s beneficial to inspect the pups for signs of distress, such as discoloration or wilting. Adjusting water levels is critical; ensure the root nodes remain submerged while keeping leaves above the waterline. Once roots reach around 2 to 3 inches long, it’s appropriate to prepare for the transition to potting soil. This careful attention ensures strong, healthy plants ready for growth.
Common Mistakes to Avoid
Avoiding common mistakes ensures successful spider plant propagation in water. Understanding these pitfalls helps maintain healthy plants throughout the process.
Overcrowding in Water
Overcrowding can hinder healthy growth. Limiting the number of cuttings in a single container promotes better root development. Each cutting benefits from adequate space for roots to expand. Placing multiple pups too close together leads to competition for nutrients and light. Spacing them apart fosters healthier growth and increases the likelihood of survival. Opt for larger containers if propagating several pups simultaneously, allowing each plant space to thrive.
Neglecting Water Quality
Neglecting water quality affects the health of spider plant cuttings. Tap water commonly contains chemicals that hinder root development. Using distilled or filtered water prevents these harmful chemicals from limiting growth potential. Regularly changing the water keeps it fresh and clear, minimizing the risk of bacterial or fungal growth. Fresh water allows roots to absorb essential nutrients more effectively. Consistent attention to water quality establishes a strong foundation for healthy plants.
Conclusion
Spider plant propagation in water offers an accessible and rewarding experience for plant lovers. By following simple steps and maintaining proper care, anyone can enjoy the satisfaction of nurturing new plants. This method not only enhances indoor air quality but also adds a touch of greenery to any space.
With the ability to monitor root growth and ensure healthy development, water propagation stands out as a preferred choice. As roots flourish, the opportunity to share vibrant spider plants with friends and family becomes an exciting possibility. Embracing this propagation technique allows for the expansion of one’s plant collection while contributing to a healthier home environment.
Olivia Wang
Olivia Wang is a passionate urban gardening advocate who brings a fresh perspective to small-space cultivation and indoor gardening solutions. Her writing focuses on container gardening, vertical growing systems, and practical ways to create thriving gardens in limited spaces. With a keen interest in Asian herbs and vegetables, Olivia shares unique insights into growing traditional Asian crops in Western climates.
Known for her clear, step-by-step approach, Olivia makes complex gardening concepts accessible to beginners while offering innovative techniques for experienced gardeners. Her articles blend practical advice with creative solutions for modern gardening challenges. When not writing or tending to her own urban garden, Olivia experiments with hydroponic systems and explores local community gardens for inspiration.
Through her engaging writing style, she helps readers transform their living spaces into productive, beautiful gardens, regardless of size constraints.